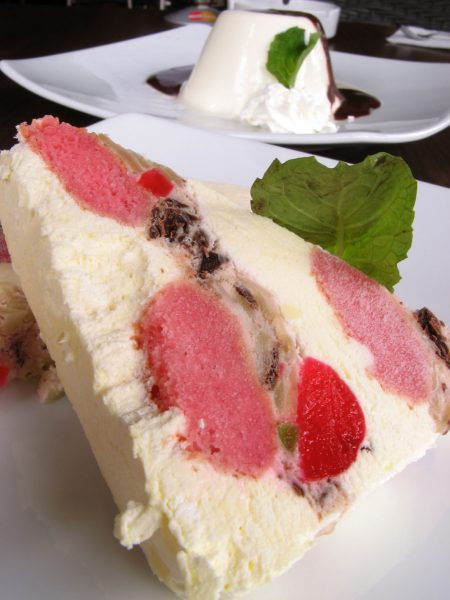
Ice Cream Cake Recipe
This post may contain affiliate links. For more information, see my full disclosures here.
Ice Cream Cake has to be one of the easiest treats to make. The choices are limitless and the results sublime.
If you are familiar with food allergies, you know all to well how difficult it is to find a pre-made “allergy safe” ice cream cake. Many may contain nuts or ingredients cross contaminated with nuts. Why not make your own and for a fraction of the cost of a store bought cake?
There are so many flavor combinations and allergy friendly choices at your fingertips. You can keep it simple or combine multiple layers. Soy or rice based ice cream can be used for those with dairy allergies. Allergy friendly chocolate and candies can be found. You can even make your own ice cream and sauces. There is really no way to screw up an ice cream cake.
Ingredients
Ice Cream, Frozen Yogurt, Sherbet, or Sorbet
(Store Bought or home made)
Cookies, brownies or Cake
(For crumbling, layering or mixing in)
Variety of optional mix ins
(Candies, caramels, marshmallow, fudge sauce and or fluff etc.)
Cool Whip, heavy cream and chocolate chips
(Optional)
Instructions
An ice cream cake can be made in any shape or size so long as you have enough ingredients. A spring form pan works nicely as does a rectangular or square disposable aluminum pan.
Line your pan of choice with plastic wrap so that the plastic hangs over the sides. This will help with getting the entire cake out of the pan if you choose so for presentation or frosting purposes.
Start your first layer. This can be cake, cookies, brownies or ice cream. I like to make a first layer of chocolate ganache by heating 1-2 cups of heavy cream and adding 1-2 cups of chocolate chips. When the ganache cools, I use it as a base layer. I then sprinkle crumbled cookie crumbs on top and lightly press into the ganache. (A food processor is great for crumbling cookies.) The pan goes into the freezer to set.
The second layer of my cake is typically an ice cream layer. I make my own home made ice cream so it’s soft. You can use store bought ice cream and leave on the counter to soften, or soften in the microwave in ten second intervals. Spread the softened ice cream over the hardened chocolate ganache and cookie layer.
The third layer can be anything you like. I like to use small slivers or crumbled chunks of cake. I lightly press them into the ice cream mixture. The pan goes back into the freezer to set.
The fourth layer can be an additional ice cream layer or you can spread Cool Whip (whipped topping) over the hardened cake and ice cream layer. Put the pan back in the freezer.
The fifth layer is what I like to call the “fun” layer. Here you can swirl or spread fudge sauce, butter scotch sauce, marshmallow fluff. You can also add chocolate chips or candies. Back to the freezer again.
The sixth layer is the final ice cream layer. Smooth the softened ice cream as evenly as possible. If you are leaving the cake in the pan or you are finished, you can sprinkle the top of the cake with candy or more cookie crumbs. You can also add an optional last layer.
If adding the optional last layer, put the cake back in the freezer as soon as you’ve added the final layer of ice cream. When the cake has completely hardened you can frost the top with Cool Whip (whipped topping) OR you can remove the cake from it’s pan and frost the entire cake with the Cool Whip. You can sprinkle this layer with crumbled cookies, candy or leave plain. Put the cake back into the freezer until you are ready to enjoy.
Make sure you pull the cake out about 10-20 minutes before you plan to eat it so that it has enough time to soften. If cutting is difficult warm your knife under hot water.
Additional Tips
If you are sticking to ice cream only (without mix ins or cake/cookies layers) be creative. Try mint chocolate chip or chocolate chip ice cream for one layer and chocolate for another. Or try a coffee ice cream layer and a chocolate ice cream layer. Top with shaved chocolate.
You can also use small freezer safe bowls, aluminum cupcake liners, ice cream cones or ramekins for mini ice cream cakes. Same directions and ingredients but on a smaller scale.


Thanks for the comment. I hope you enjoy the cake! 🙂
I love baking cake but I’m really interested in your ice cream cake here. Sounds like something my kids will rave about, lol! They love helping out in the kitchen, I think this is something they can enjoy doing with me. Thanks for sharing this one.